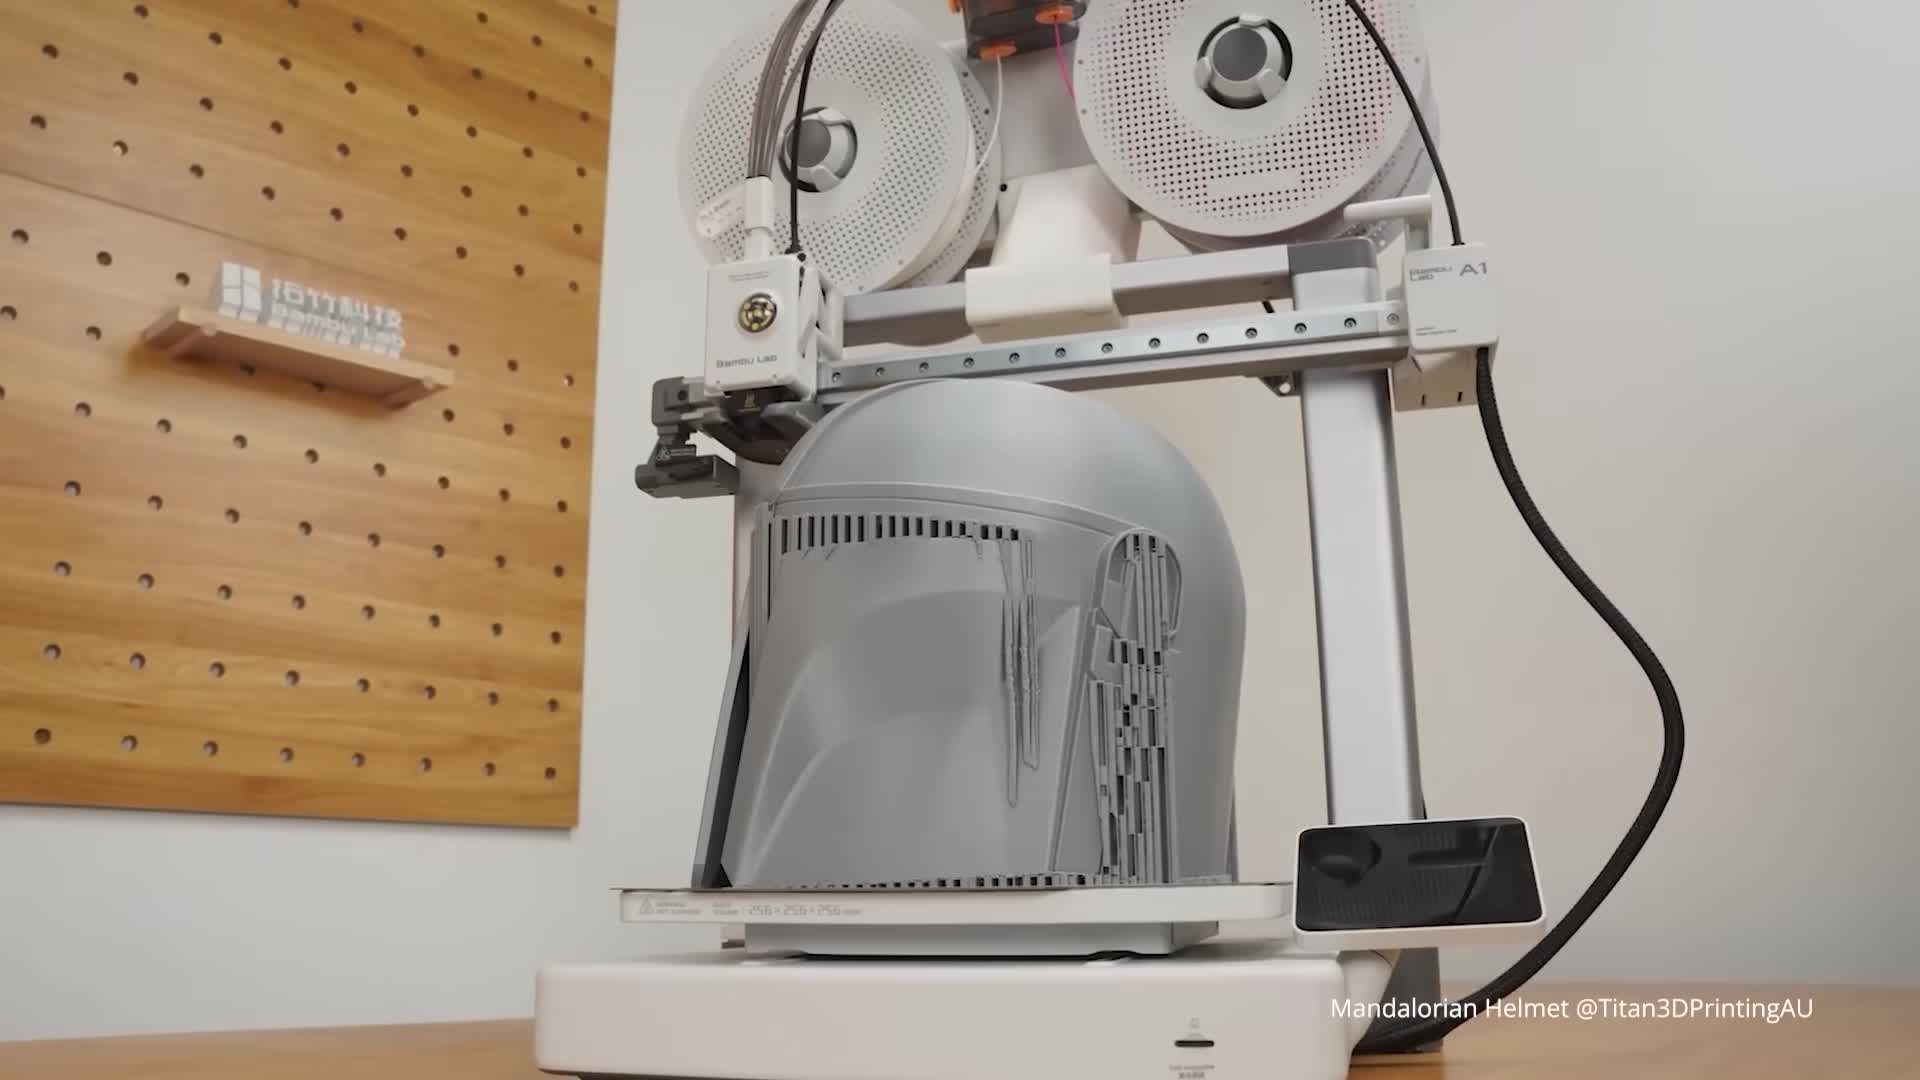
This is a 3D printer, or as some may call it, a money printing machine.
And with one, I'm going to try to start a 3D printing business in seven days.
I'll be going over the whole process, from designing to printing to selling.
With people reportedly making tens of thousands of dollars, let's see how much money I can make.
The first thing we need is a 3D printer.
A 3D printer prints 3D objects layer by layer using materials like plastic.
It can be used to create all kinds of different products decorations toys tools, pretty much anything that can be designed as a 3D model, making it a great tool to earn money with.
I've been doing some research and I'm thinking of buying one from Bamboo Lab.
This brand looks to be the most popular in the market and offers a good range of 3D printers.
I'm eyeing their A1 model.
It seems beginner friendly, yet powerful enough to make whatever my heart desires.
Oh, that looks crazy.
I'm gonna go with the combo version that includes the AMS light, an accessory that enables multicolor printing and automatic loading of filament.
Let's add it to the cart.
Speaking of filament, I need to get some.
This is the material that a 3D printer prints with.
There are various types to choose from with differing properties, strengths, and weaknesses.
The most popular filament all around is PLA.
It's easy to print, affordable, and comes in many different colors and finishes.
While it is reasonably strong, it is more brittle compared to other filaments, making it not the most durable.
For a more durable filament, many go with PETG.
It's stronger and more resistant to heat, UV, moisture, and chemicals.
The catch is it's a bit harder to print than PLA because it's more prone to stringing.
I'm gonna grab one black PLA Basic, one white PLA Matte, one ash gray PLA Matte and one white PETG Basic.
In total, it looks like this 3D printing business will cost me $552.96.
The question is, will I be printing money?
Let's find out.
The 3D printer arrived shortly, and it was time to set it up.
Inside the box were quite a few levels of pieces, but the setup steps were pretty straightforward, so it didn't take long until the machine was plugged in and ready to play.
To test things out, my first print will be the iconic Benchy Bow.
This is a special model designed to test and evaluate a 3D printer's capabilities, with all its different shapes and details.
I opened and loaded my film and selected the preloaded Benchy in the A1 on its touchscreen.
I selected the filament I wanted to print with, and with that, my first print was off.
Woo, it's going fast, holy.
While we wait for Benji to print.
If you're thinking of starting your own 3D printing business, or really any business, I've linked in the description the ultimate kit of entrepreneurship resources for you to download for free.
This kit has everything you need to launch your own business, including a must-read guide on how to become a successful entrepreneur.
It walks you through developing a business plan, analyzing opportunities and my favorite section identifying business ideas, which covers multiple practical techniques you can use to brainstorm.
And once you have a business idea.
The kit also includes a guide on how to scale your business as a solopreneur, 30 professional email templates, 21 project management templates and a tool to calculate how much your business should charge to bring in that money.
This kit's got you.
These free resources were all made by HubSpot.
A big shout out to them for hooking us up and sponsoring today's video.
Woo!
Benchy is done!
That only took 20 minutes to print.
Wow, this is so cool.
It printed out so nicely.
This 3D printing business is officially off the ground.
With the machine working smoothly.
I started browsing Maker World for more free models to print, all uploaded by the 3D printing community.
I wanted to gain more 3D printing experience and gather ideas for a product I could print and sell.
I decided my next print would be a bed scraper to help remove prints from my build plate.
I opened one up in the Bamboo Studio slicing software.
Set the filament to PETG Basic White, hit Slice Plate to view all the individual layers to be printed.
Then pressed Print Plate and Send.
While the 3D printer did its thang, I took out the razor blade and screws included with the A1 and once the print finished, I assembled a sleek bed scraper for myself.
That's when I noticed that to purge old filament, the A1 produces these little plastic poops that litter my table.
So I printed a poop bucket and deflector, and then the prints just snowballed from there.
I printed functional tools like a cable holder to conveniently organize my cables on my desk and a toothpaste squeezer that lets me squeeze out every last drop.
I then switched to printing fun items like a lifelike Oreo that, when twisted, made a satisfying clicking sound.
ASMR.
And then I found it, the ultimate print, a giant 10 to one scale Lego minifigure.
This was a big model, 43 individual pieces and 661 grams of filament.
Printing this Lego man would completely take up a whole precious day in this seven day challenge.
But if I could successfully print this, I knew that I would be ready to print any product to sell.
So I sent it.
I first printed the legs, then the hips, then the arms, then the hands, then the pins.
It was all coming together.
It was late, so I set up the head to be printed overnight and went to bed.
And on day three, I woke up to a head and a headache.
Something went wrong.
After looking into it, I discovered that, due to the model's overhang, gravity pulled the filament down before it could solidify, causing it to droop and curl and create a mess.
To deal with overhangs, supports are usually added to a model and removed by hand after printing.
I started getting nervous because I didn't know how to add them.
Luckily, I found a print profile of the Lego head with supports.
I sent it off, crossed my fingers, and... looks so much better compared to the old one.
Finally, all I had left was the torso.
This model had no overhang, so it was going to be a breeze.
I hit print and four hours later, the 3D printer just stopped printing halfway.
Did my machine just break?
I stopped the print and looked up the problem.
It seemed like my 3D printer's nozzle was clogged, preventing filament from extruding.
Fortunately, this is very common in 3D printing with a simple fix.
I headed to control and set the nozzle to 100 degrees Celsius.
Then I removed the front cover of the tool head, took out the silicone sock and, being careful not to burn myself, detached the hot end.
Using pliers, I grabbed the filament stuck in the hot end and yanked that baby out.
With that, my nozzle was unclogged and ready to reprint the torso successfully.
Or so I hoped.
The thing was, the previous failed prints had wasted a lot of my PLA matte white filament.
If the print failed again, I wouldn't be able to finish the Lego minifigure.
I only had one shot left.
The print has passed the point where it stopped last time.
Please, please, please.
And after putting it together, it looked amazing.
It's day four and it's time to decide on my product.
From what I've learned through my tests, I've come up with three criteria that I want it to meet.
Number one, it works with this filament.
The quality of a 3D printed product will depend on the filament used to print it.
Since I've only got PLA and PETG on my hands right now, it's best I choose a product that works with their strengths and not their weaknesses.
This means avoiding products that need to be very durable, flexible, or heavy.
Number two, it has an intricate design.
A key advantage of 3D printing, compared to traditional plastic manufacturing methods like injection molding, is its ability to create more complex and detailed designs.
I want to leverage this strength by giving my product an intricate design to help it stand out from the competition.
And finally, number three, it's easy to design.
Being a complete noob in this space, I know nothing about 3D modeling.
And with only four days left in the challenge, I don't expect to master it either.
I barely knew what I was doing in the slicer.
Sure, I can probably download a commercially licensed 3D model to print and sell, but I personally want to start from scratch for this challenge.
Therefore, I need a product that's easy to design.
I spent the day searching on Etsy, MakerWorld, and Google for that perfect product.
And then I figured it out.
I'm going to sell orchid vases.
They work with the properties of PLA and PETG, can feature an intricate design and are relatively easy to design.
Now, why vases for orchids specifically?
Other than being a way to differentiate my vase from the many out there, orchids are an expensive plant, often purchased for display.
My educated guess is that people are willing to spend more on a nice vase for their orchid versus other plants.
Additionally, orchids are placed away from direct sunlight and don't need much watering.
This is ideal for vases made of PLA and PETG, as less exposure to sunlight and water helps extend their lifespan.
Let's get designing!
I began by looking to popular 3D modeling software used for 3D printing, such as Fusion 360, Tinkercad and Blender.
Not going to lie, they all looked a bit complicated to learn, at least within the timeframe I had of one day.
Thankfully, I found a Make My Vase tool on Maker World with an intuitive interface.
This was exactly what I needed.
I got an orchid and measured the plastic pot that it came with to determine the diameter and height needed for my vase.
I plan for my vase to fit the plastic pot inside, as orchids usually come with one.
With my measurements in millimeters, I determined the dimensions of my vase, then experimented on its design.
I explored different cross section shapes, body shapes, and surface effects.
Eventually, I landed on an elegant, intricate vase with a spiraling strip pattern.
I downloaded the 3MF file, opened it in Bamboo Studio, and set my filament to PETG Basic White.
I wanted this vase to be as durable as I could have it be.
I also set the order of wall setting to outer slash inner, as I read that printing outside in can lead to smoother results.
The print was expected to take 12 hours long.
I prayed that it wouldn't stop midway.
I hit send and let my 3D printer run as I went to bed.
Good morning, y'all.
See how this vase printed.
Oh my goodness.
It looks great.
The details.
I like how the stripes scatter light and reduce the reflections of PETG, creating a softer look.
Now I do notice an interesting line around the base of the vase.
Not sure where this came from.
My guess is that it's due to me switching the order of wall setting to outer slash inner, but I don't mind it.
Okay, let's see if this orchid fits in it.
Moment of truth.
Come on, please, please.
Oh my God.
It's a perfect fit.
It looks so good.
I have my product.
Now with my vase in hand, it's time to sell it.
So what's the business plan?
Many people sell 3D printed vases on Etsy, local markets, and even Facebook marketplace.
For myself, I'll be using a sales channel that is quite unique, my mom.
No, I'm not planning to sell my vase to my mom.
I'm planning to sell it through her.
You see, she just so happens to be a floral designer who sells lots and lots of orchids.
My hope is that I can partner with her and sell the vase with one of her orchids.
But first, I need to see if my mom is even willing to.
She's particular with her vases and won't sell mine to her customers if it's not up to her standards.
I need to impress her.
Maybe I should have asked for her opinion first before spending 12 hours printing this vase.
Wish me luck.
Okay, Ma, here it is.
What do you think?
I like the color, the pattern, and then the shape.
And it fits well.
It doesn't look like plastic.
Yeah, very nice.
Would you sell this to your customers?
Yes, I will sell it to my customer.
I'm quite confident.
How much do you think I could charge for?
$15 to $20.
I'll take it.
Okay.
With my mom's approval, my sales channel is set.
However, this doesn't mean I have a guaranteed sale.
My mom can only sell it if one of her customers want to buy it.
And she doesn't usually sell plastic vases with her orchids.
She told me that she has some leads right now, but we'll see.
Hoping for the best.
It's day six and my mom sold an orchid today.
Unfortunately, the customer didn't buy my vase.
They went with a ceramic face.
It's all good, i still have tomorrow and my mom's talking to another potential customer right now.
But this has really got me thinking.
Can 3d printed products truly compete with non-3d printed products?
Take, for instance, ceramic and glass phases.
I'd say that, in terms of solely material, most people prefer the look of ceramic and glass vases over plastic ones.
While there are people out there that prefer plastic vases, it's typically not just because of their look.
It's often because they're lighter, less fragile and or cheaper, especially that last one.
And that's an issue.
There's a limit to how much I can charge for a 3D printed plastic vase before customers switch to looking at ceramic and glass vases.
The kicker is ceramic and glass vases aren't even that much more expensive.
These vases I have cost around $15 each.
On top of that, 3D printed vases have to compete with vases made using traditional plastic manufacturing methods like injection molding, which can produce smoother, more durable vases in bulk at a lower cost.
That's going to be tough.
I think it all comes down to this.
Any 3D printed product can compete with non-3D printed products, as long as it checks off one of these two critical things.
Number one, the 3D printed product takes advantage of 3D printing's strengths.
3D printing should be the best method to manufacture, not a method, but the best method.
For example, it could be a product with an intricate design that can only be manufactured using 3D printing, or a product that requires customization for every customer, where manufacturing it using other methods would be too costly.
These products will be able to compete with non-3D printed alternatives, because they'll naturally be the best option out there.
Number two, the 3D printed product offers intangible value.
This could be the meaning behind it, the uniqueness it has, the status it gives, the emotions it evokes, anything that can increase its perceived value to make it worth purchasing.
Basically, it needs good marketing.
For my vase, I'm relying on this second point.
I'm betting that the intangible value of my mom's recommendation to her customers and her ability to conveniently bundle the vase with her orchids is enough to help sell it.
I guess there's only one way to find out.
I'll see you tomorrow.
It's day seven and the end of the challenge.
It is crazy to say, but we made the sale!
A customer bought an orchid with my vase.
My mom told me that they loved its design.
Getting into the numbers, I sold the vase through my mom for 15, which equals the total revenue I earned.
For my expenses, it cost me $6.38 for the 255 grams of filament I used to print the vase.
In total, my net income for this challenge is $8.62.
Now, of course, the number is just considering the variable costs of the vase.
If I factor in the 3D printer and the four rolls of filament I purchased, I'm currently down 54434.
But I see those as upfront investments that I can continue to use to make money, with eventually breaking even on them.
This is just the beginning.
Comment below if you want to see me sell a 3D printed product for 30 days and if it should also involve a laser engraving machine.
That'd be cool.
Be sure to like this video, subscribe if you haven't already, and peace out.